A Cheap Alternative to Framing a Painting
Simon Bland: 24 Oct 2017
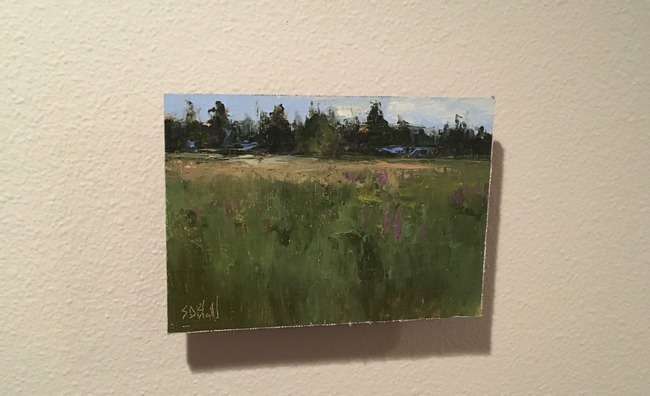
This method lets painting panels be hung so that they stand out from the wall.
Let's face it, whether you buy retail or wholesale, the cost of framing your artwork in advance of a show can leave a dent in your finances.
In this blog post I show you a simple way to transform your small painting panels so that they can be sold ready to hang. Not only will this save you money, it will let you offer more affordable artwork to your customers.
I've previously written a blog post explaining how to make your own painting panels. In this article I'm assuming that your panels are made from plywood, hardboard, or MDF. I don't recommend doing this with cardboard panels.
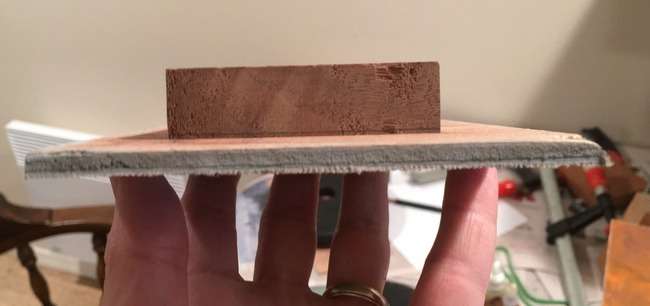
The basic idea is that we'll be attaching a piece of wood to the back of a painting panel that makes it stand out from the wall. A hole is drilled into the wood at an angle so that the whole thing can be easily mounted on a single nail. This demo was done with a small 5x7 panel. I've used it on panels up to 8x10 without needing to glue-up wood to make wider pieces.
This works better if the edges are first cleaned up
I'm doing this with a finished painting because I want to make sure that the edges are cleaned up. I first ran the edges of the painting through a jointer to make sure they were level and even. A small edge plane works equally as well. If you don't have either of those, then use sandpaper in a sanding block.
I lightly sanded the edges to remove any rough spots, splinters and stray threads. After that, I painted the edges of the panel with a thin application of gray acrylic paint.
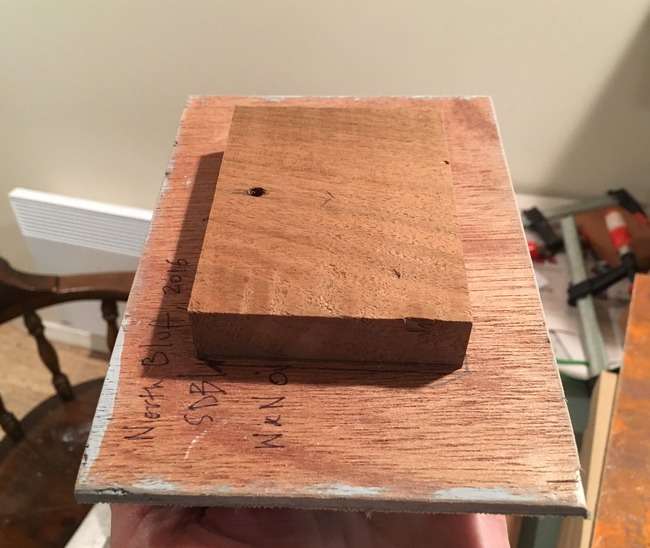
The wood block must be cut so that the grain will align with the grain of the top plywood layer
For this small panel, I cut a piece of scrap 1x4 walnut that fit inside the panel with about 0.75"–1.5" of clearance all round. As you can see, the size of the wood I used meant that there was more clearance at the sides than at the top and bottom. That's fine.
I used a 10" crosscut saw to get clean 90°cuts. Use a miter box or just cut by hand if you use a handsaw—the cuts don't need to be perfect as they will be difficult to see once the panel is mounted on a wall.
If you're buying wood specifically for this purpose, ask to buy discounted wood from the cull bin or off-cut pile at a mill shop or hardware store. The short lengths of wood that normally get thrown away are ideal for this purpose.
For best results use a hardwood like poplar, maple, cherry, walnut or oak.
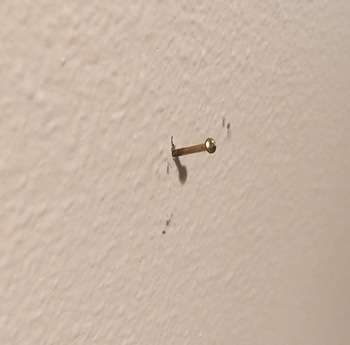
The hole is drilled at an angle that approximately matches the angle of a nail when it is used in a picture hanger
Before attaching the wood to the panel I drilled a small hole in the center near the top. The hole was drilled at about a 45 degree angle to perpendicular. It should receive a nail that's been placed in a wall at the same angle used for a regular picture hanger.
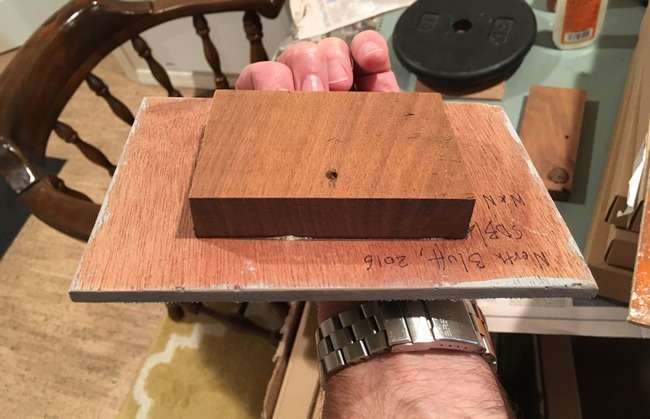
The hole aligns with the center of the wood and the panel
I glued the wood to the back of the panel using polyurethane glue and left it overnight with a weight on top. Regular wood glue would also work. If using plywood panels, the grain of the wood should align with the grain of the plywood layer on the back.
An optional thin coating of shellac can be applied to the wood once the glue is dry.
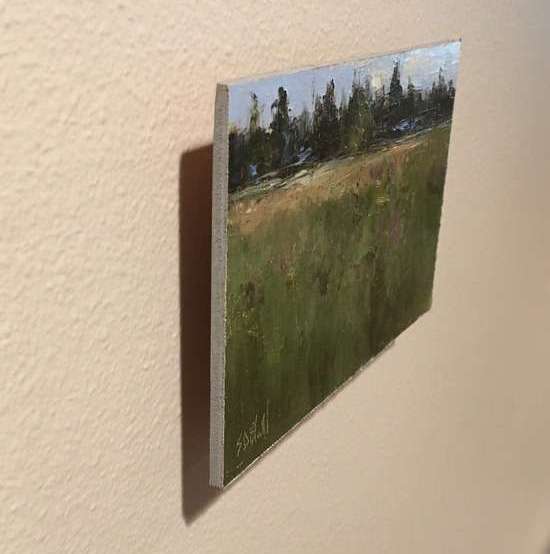
The finished product.
With the right tools this takes about 10 minutes effort per panel, plus another 10 minutes for painting the edges and applying shellac. Allow 12–24 hrs for drying time. You can do as many panels at once as you have room for.
Simon Bland: 24 Oct 2017