Preparing Linen - A Short How-To Guide
Simon Bland: 13 Apr 2016
For the past few years, I've been preparing my own linen and painting surfaces for a fraction of the cost of buying rolls of primed linen or ready-made canvases.
I've written this post to document my own experiences and show you how to prepare a canvas from scratch. While I realize that many readers won't have the time or space to do this, I think that every artist who works on canvas should do it at least once.
Raw Canvas
Of the several types of canvas that can be used as a painting support, linen and cotton are the most popular. They typically have the same plain weave, although cotton duck is heavier and more tightly woven, and they are both prepared in the same way. I use linen in this article, but the same process can be used for cotton canvases or those made from any other type of natural fiber.
Let's start by looking at some of the different fabrics that can be used for painting canvas. These photographs were all taken at the same scale.

Raw portrait-grade linen
The Belgian portrait-grade linen (shown here under a microscope) costs about $30 per yard for a 54" wide piece. This is Dick Blick portrait medium (8.85oz). You can see that it has a tight weave and there are no large holes visible between the threads. There's some random variation in the texture which is part of the attraction of using this as a painting surface.

Drapery linen from the fabric store
The other linen shown here is a drapery fabric. It was bought at a local fabric store for $11 per yard (it is 53" wide). There are noticeable holes between the threads. It had a lower thread count than the Belgian linen, the weave is less tight, and it is a lighter weight. There is a pattern to the weave (due to difference in the thickness of threads) which gives it a slightly mechanical look when it is finished.

Hemp canvas from an online retailer.
This 11oz weight hemp canvas has more surface texture than the portrait grade linen above, otherwise they have similar appearance, strength, and longevity.

Cotton duck canvas.
A slightly fuzzy photo of some cotton canvas. After priming it tends to have a more uniform appearance than linen and this lack of knots and surface irregularities takes away from the character of the surface.
Frame
Canvas is typically prepared by first stretching it either over a purpose-built frame or directly on to stretcher bars. It is also possible to glue raw canvas directly to a panel, however, while it is good for using up leftover fabric, it is a slightly more complicated process.
The first method is easier and better for beginners so we will begin there.

The linen is prepared on a frame made from 2x4's with some cross bracing. The detachable legs make it easier to store.
Before starting make sure the linen is not creased or wrinkled, and iron it if needed.
The linen is attached to a frame using a heavy-duty stapler with staples placed every three inches or so around the outside edge. It's important that the fabric is not stretched tight at this point (the linen is going to tighten up considerably when size is applied), so stretch it gently using your fingers—just enough so that it starts to hold its own weight. The threads are lined up to be parallel to and perpendicular to the edges of the frame.
A heavy-duty, extra-large frame makes it possible to prepare canvas in bulk, but you can also prepare canvas directly on stretcher bars.
My frame is made from 2x4's and has cross bracing—everything is bolted together—and it has some detachable legs that screw into brackets on the underside. It measures about 4ft wide by 7ft long. I do find that the first inch or so around the outer edge of the prepared linen can sometimes contain flaws such as wrinkles that no amount of stretching will remove. If you're preparing linen for a large painting, make sure to bear this in mind.
As you can see, I'm preparing this linen in the garage where I have plenty of room to work. Working in an interior space is fine when using water-based products, but I apply oil-based primer outdoors and allow it to dry in a sheltered area outside.
Sizing
Natural canvas used as a painting surface must be sized. Size is the term for a diluted adhesive that penetrates the fibers of the canvas, makes it less absorbent, and provides a buffer against oil paint.

Linen with two applications of PVA size. The water in the size has caused the canvas to tighten up.
I recommend using polyvinyl acetate (PVA) size—a mix of approximately 25% pH-neutral PVA adhesive and 75% water—which I use instead of the traditional rabbit skin glue (RSG). The main advantage of PVA is that it doesn't absorb much, if any, moisture from the atmosphere, so it stabilizes the canvas better than RSG does. It is also easier to prepare.
You can easily make PVA size yourself from white glue and water (you can buy it premixed, but it's about six times more expensive than making your own). However, a note of caution: Elmer's white glue is not pH neutral and is not suitable for use as a size—use a brand like Lineco instead.
Starting in the center of the linen and working outwards, apply a coat of PVA size with a 2" house paint brush, carefully massaging the size into the weave of the linen so it is well absorbed and doesn't pool on the surface. When it is fully dry, apply a second coat of size.
After the second coat is dry, gently sand the canvas with fine sandpaper. Sanding the canvas at this stage is important—it will break off fuzzy fibers and smooth out any knots and irregularities—so don't skip this step.
Seal (Optional)
It is almost impossible to fill all the holes in the linen using PVA size alone and putting too much size on the surface of the canvas can limit the adhesion of subsequent layers of primer. Yet, if you don't seal the holes in the linen, the primer will bleed through to the back side of the linen. Although this is not really a concern for the long-term survival of the linen (because it's buffered by the size) it can easily be prevented by applying a sealing layer.

After the canvas is brushed free of dust, a thin layer of clear acrylic gesso is applied, brushing it carefully into the weave of the linen with a large brush (I use the same 2" house paint brush that I use for the size). The clear acrylic gesso is prepared by mixing acrylic matte medium with marble dust and water. I've tried mixing these in various proportions and found that four parts medium, one part marble dust and two parts water works well. Adding too much marble dust makes the gesso brittle.
If you got the linen tension right at the start, you should find that you can get through all the stages of preparing the linen without the need to re-stretch it. If not, you'll need to remove all the staples and re-attach the linen to the frame, stretching firmly with canvas pliers. Staples are required every three inches or so. This part takes a little bit of strength, as well as some technique and practice.
If you do need to re-stretch the linen, you can do so after this layer of sealer is applied. But if it looks very creased or wrinkled then re-stretch as soon as the size is dry.
Ground
With the linen now sized and sealed, it's time to get busy with the primer. Before going further, lightly sand down the linen and brush off any dust.
The next steps come down to personal preference: you could simply apply another coat of clear acrylic gesso for a natural linen look; or, for a modern white canvas, you can apply layers of white acrylic gesso.
For oil-primed linen I recommend starting with layers of white acrylic gesso before adding a final layer of oil primer: it is much faster to do it this way and you will also reduce your exposure to petroleum distillates.

The first layer of gesso always looks a little patchy.
The layers of white acrylic gesso should be applied thinly. As a rule of thumb, I dilute the gesso to about the same consistency as house paint.
Make sure that the gesso is worked into the surface of the canvas so that the holes are filled. The most efficient way to apply it is with a 4" roller—it is much faster, and you will get a more even coat than you do with a brush.
Allow the gesso to dry between coats then lightly sandpaper the canvas and brush off any dust before applying the next.
As you add more layers of primer the weave will become filled, and the canvas will get smoother. If you prefer to work on acrylic ground, then all you need to do is add more layers of gesso until you have a surface texture that appeals to you.
Oil Primer
I prefer to paint on an oil-based ground, so I apply at least one final layer of oil-based primer over the top of the white gesso. I've found that a medium portrait texture linen is acceptable for painting with around four layers of primer (the clear sealer, two acrylic, one oil).
Fine grades of linen have less weave to fill in and require fewer layers of primer. Heavy grades of linen may take up to six.
I apply oil ground with a 1.5" bristle brush as oil-based primer is too thick to apply with the same large brush I use for acrylic gesso. You may find it difficult to work with at first, but it's all in the technique. This short video explains how to get good coverage with the primer.
A faster way is to apply the oil primer with a large spatula or putty knife. Once the canvas is well covered you can quickly go over the surface with a brush to ensure that the primer is worked into the weave and is evenly applied.
Brands of oil painting primer have different formulations and drying times: Winsor and Newton Oil Painting Primer dries fully in two days at room temperature, Fredrix Oil Priming dries in four days and Gamblin Oil Painting Ground takes about a week. Note that these products all dry to the touch much more quickly than this, but you should wait until the primer is properly cured before using the canvas.
I find that adding some solvent to these primers makes them easier to apply—in general I try to get them to a consistency that's a little thicker than house paint—and I always try to apply them in a thin coat.

Once the solvent content has evaporated and the oil ground feels dry to the touch, I hang the linen up for a day or two to finish curing. It saves a lot of space this way.
The drying time of the oil-based primer depends on the manufacturer and the temperature, yet they all have one thing in common: claims about drying time are wildly optimistic. Don't attempt to sand down and repaint a layer of oil primer until you are certain that it's fully dry.
Storage
When the canvas is finished it can be cut to size with scissors or a knife then stretched on your favorite stretcher bars or mounted on panels. Store any unused canvas rolled up around a tube with the primed side outwards.
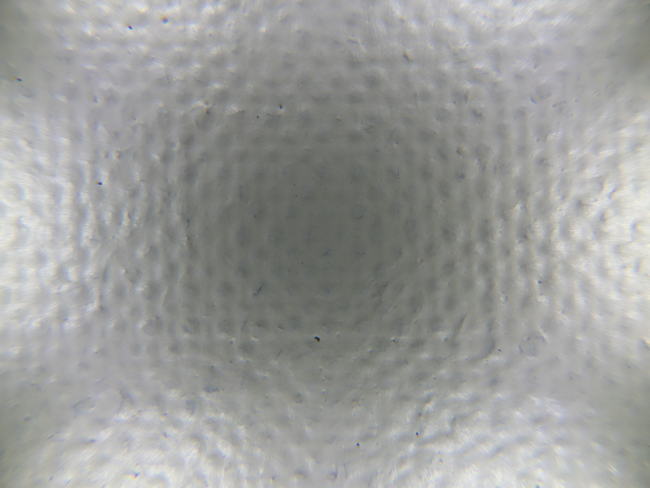
Close-up of portrait grade linen with final layer of oil primer. Microscopic pores at the surface are typical of all canvases.

Oil primed linen cut to size and mounted on a panel. This is the cheap linen - not bad!
The blog post was updated in January 2022.
Simon Bland: 13 Apr 2016